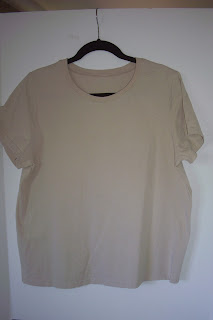
Find a T-Shirt that you really like the fit of. To me for a more feminine shirt, the cap of the sleeve (where the sleeve and shoulder seam meet) should be at the shoulder and not down your arm a ways.
Turn the shirt inside out. Press the sleeve flat.
Fold some pattern making paper or whatever you can see somewhat see through and trace the sleeve. Match the pattern fold line and the sleeve fold line together. I left 1 1/2" at the bottom of the sleeve pattern for a hem allowance if needed.
Add 1/4" seam allowance to the underarm an sleeve top. The bottom line is the hem line.
The body of the shirt is easier to do if you lay it on the pattern making paper and trace around it. Make sure the pattern making paper is folded in half for this too. Match the fold lines of paper and shirt together. My T-Shirt was slightly out of shape at the shoulder. Just make sure you draw a straight shoulder line from neck to sleeve top. Add 1/4 inch seam allowance if needed.
Fold back all but the one layer of the neckline front and trace along that line.
Cut out your pattern and lay it on the shirt you want to remake. I did unstitch part of the sleeve at the top, so the new pattern would fit. Cut it out. This sleeve was slightly wider, so I decided to just ease the extra fabric into the shirt.
Now lay the body of the shirt pattern on the body of the T-Shirt. I find the unixex T-Shirts to be long too. Match the hem line of the pattern with the hem line of the shirt. Pin to one half of the shirt and cut it out.
Open the shirt so the front neckline can be cut. Carefully cut along the line you drew for the front of the shirt. BE CAREFUL TO CUT ONLY THE FRONT LAYER OF THE SHIRT. Save the piece that is the back of the shirt cutting line for future remakes.
Sew the new shoulder seams back together. If your shirt was really big and you had to cut the sides then sew them together too. Fold the neckline in half matching shoulder seams and all neck edges. Mark the center front and center back.
Now match the center front and back marks and and all the neck edges and mark at the fold lines. These fold points will not be at the shoulder seams since the neck opening is lower in the front.
No picture for the next steps. Sorry I forgot to take them. Unstitch the neck ribbing and slightly stretch it. Fold it in half at the seam line and mark it at the two folded edges. Now refold with the marks together and mark the new fold lines. You are actually dividing the ribbing into 4 even sections. Now match each of the four ribbing marks with the four shirt neckline marks. Make sure the seam in the ribbing is at the center back mark of the neck. The ribbing should be a little smaller. Sew the ribbing on with 1/4" seams. The ribbing should be on top. Stretch between pins when sewing. If the ribbing does not stretch enough it will flop down instead of stand up on the shirt. Ribbing should never be larger than 3/4 of the neck opening.
A finished somewhat baggy and comfy T-Shirt that looks more feminine.


No comments:
Post a Comment